How to Use Lighting for Art Displays to Highlight Art and Architectural Features in 2025

Did you know that proper lighting can increase the perceived value of artwork by up to 50%? It’s true! Whether you’re a gallery owner, interior designer, or art enthusiast, mastering the art of lighting can transform your space from ordinary to extraordinary.
In this guide, we’ll dive into the world of illumination and explore how to use lighting to highlight art and architectural features. Get ready to shine a light on your creativity!
The Importance of Proper Lighting for Art Displays
The right lighting for artwork isn’t just about brightness – it’s about bringing your pieces to life while protecting them from damage. Let me walk you through what I’ve discovered really works, backed by both personal trial-and-error and solid research into museum standards.
First things first – you’ve got to understand color temperature when it comes to art lighting. I learned this one the hard way! As experts we recommend LED lights between 2700K and 3000K for artwork. These temperatures provide that warm, inviting glow that makes colors pop without distorting them.
In my experience, anything above 4000K starts making everything look kind of cold and clinical and visually flat – definitely not the vibe you want in your home gallery.
Here’s something that surprised me during my lighting journey: the angle of your light matters way more than you’d think. The optimal angle for lighting artwork is typically around 30 degrees from vertical.
I actually keep a protractor in my toolkit now (yeah, I’m that person). If you position your light at this angle, you’ll minimize glare while ensuring even illumination across the piece.
The distance between your light and the artwork is super crucial too. Through lots of testing, I’ve found that the sweet spot is usually about 1.5 to 2 times the height of the artwork away from the wall.
But here’s the thing – you’ve gotta adjust based on the specific piece and the beam spread of your light. Different materials reflect light differently, and what works for an oil painting might not work for a photograph under glass.
One thing that really changed the game for me was learning about conservation-grade lighting. UV radiation is basically kryptonite for artwork – it causes fading and deterioration over time. That’s why I always recommend using LED lights with zero UV output.
They might cost a bit more upfront, but trust me, they’re worth every penny when it comes to protecting your investment. The right Lighting for Art Displays is worth the investment.
Let’s talk about brightness levels, because this is where a lot of people mess up. You want enough light to see the artwork clearly, but not so much that you’re overwhelming it.
As a general rule, most artwork looks best with illumination between 50-200 lumens per square foot. I keep a light meter app on my phone to check levels (technology is amazing, right?).
The biggest lesson I’ve learned? Always test your lighting setup before finalizing anything. What looks good on paper doesn’t always work in practice.
I remember spending hours adjusting lights for a friend’s gallery wall until we got it just right. Sometimes you just have to play around with lighting for art displays until everything clicks.
Remember – proper lighting doesn’t just show off your art; it protects it and helps create that perfect atmosphere you’re looking for.
Take your time with it, and don’t be afraid to experiment until you find what works best for your space and collection you will reap the rewards.
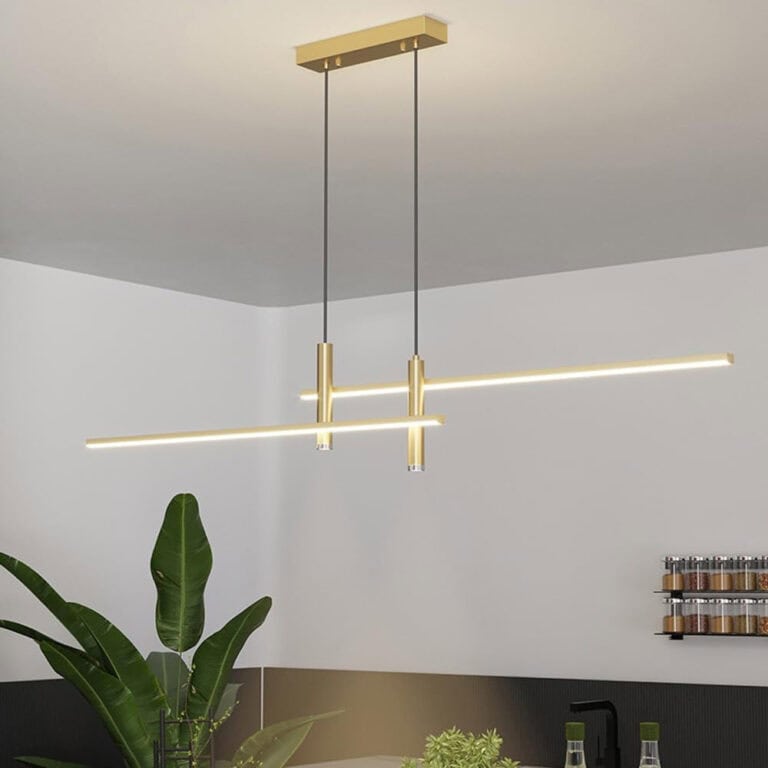
Types of Lighting Fixtures for Lighting for Art Displays
Picture lights are probably my favorite go-to option for individual pieces.
I remember installing my first museum-grade picture light – it was like seeing my favorite painting for the first time all over again! These fixtures mount directly above or on the frame itself, and they’re absolutely perfect for creating that intimate, focused illumination.
Just make sure you get one that’s proportional to your artwork – I once used a tiny picture light on a massive canvas, and it looked kind of like trying to light up a stadium with a flashlight!
Track lighting has honestly been a game-changer for my larger installation projects. It’s super versatile, which is exactly what you need when you’re dealing with multiple pieces or a gallery wall. It is also the go-to for Museums and Galleries.
The best part? You can adjust each head individually, so you’re not stuck with one-size-fits-all lighting. I typically recommend LED track heads with adjustable beam spreads – somewhere between 20-40 degrees usually does the trick for most installations.
Let me tell you about recessed lighting, because this is where things get interesting. While they’re great for general room illumination, using them as your only lighting for art displays source can be tricky.
There is what is called “Gimbled” downlights or recessed lighting that are a cost effective way to light up artwork in your home. These can be mounted in the centre of your hallway or just above your wall area and create a wash of light over the wall area. You just need to make sure you are using warm (3000K) settings.
Wall-mounted adjustable sconces are another fantastic option, especially for larger pieces. The key here is getting the right extension length from the wall.
Through trial and error, I’ve found that you want the light source to be about 20-30 inches from the wall for optimal coverage. And here’s a pro tip I wish I’d known earlier – look for sconces with rotating heads so you can fine-tune the beam direction.
Then there’s the whole world of contour lighting and LED strips. These are amazing for creating subtle, atmospheric effects around art installations. I’ve used them to backlight canvas pieces, and the effect is just stunning. Just be careful with the installation – my first attempt looked more like a disco than an art gallery because I didn’t diffuse the LEDs properly!
One thing that really surprised me was how effective portable, battery-powered LED picture lights can be. They’re perfect for renters or people who don’t want to deal with electrical work. Plus, the technology has gotten so good that some of these wireless options last for months on a single charge. Here is a Link to purchase.
When it comes to choosing the right fixture, you’ve got to consider the space as much as the art when it comes to lighting for art displays.
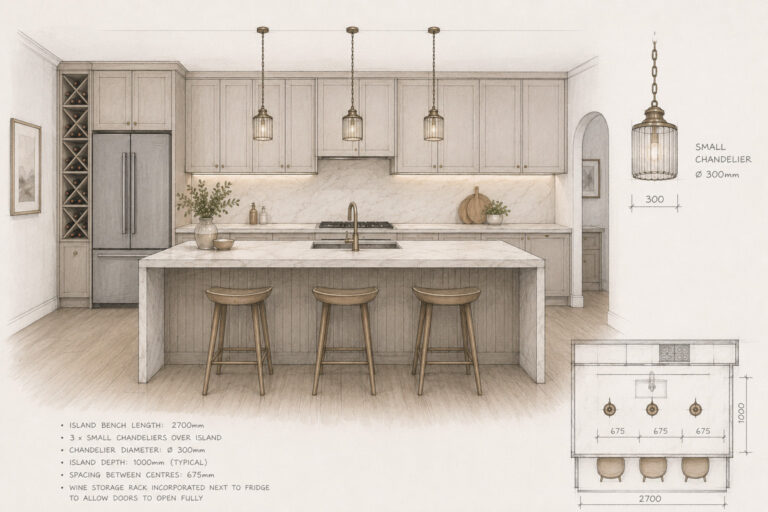
High ceilings? You might want to look at adjustable pendant lights. Historic building with plaster walls? Stick to minimally invasive options like cordless fixtures or track systems.
The architecture of your space should guide your choices just as much as the artwork does when choosing the lighting for art displays.
Remember – the best lighting fixture is the one that serves both your artistic and practical needs. Don’t get too caught up in what’s trendy or what worked in someone else’s space.
Focus on what brings out the best in your specific pieces and what fits your maintenance capabilities and budget.
Key Lighting Techniques for Art Display
Let me share what I’ve learned about lighting techniques after years in the industry. The biggest game-changer for me was understanding the rule of thirds in lighting placement.
I used to just stick lights wherever they’d fit, but once I started dividing my walls into thirds both vertically and horizontally, everything started looking so much more professional.
I once set up lights for an exhibition where every single piece had a glare spot right in the middle. The trick I’ve discovered is to position your lights at an angle where the reflection bounces away from the typical viewing position.
Usually, this means about 30-35 degrees from vertical, but you’ll want to test this based on your specific viewing angles.
So what this means when installing your lighting for art displays, is that it does not always need to be direct on. Off to the side slightly reduces the glare especially if there is glass.
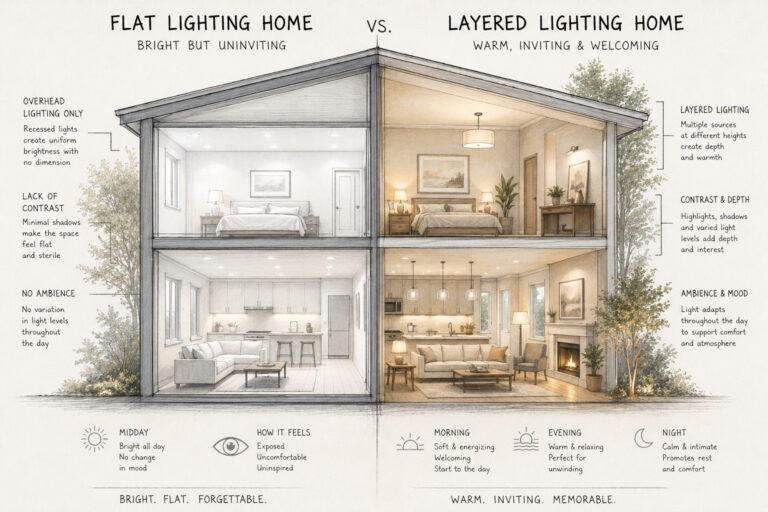
Layering light is something that took me ages to get right, but it’s absolutely crucial for creating depth in your display. Think of it like a cake – you need all three layers: ambient, accent, and task lighting.
Your ambient lighting provides the base illumination (I usually aim for about 30% of the total light level), accent lighting highlights specific pieces (about 50%), and task lighting fills in the shadows where needed (the remaining 20%).
Here’s something that blew my mind when I first learned about it: color temperature doesn’t just affect how warm or cool your space feels – it can completely transform how colors appear in artwork.
I remember setting up lights for an impressionist painting collection, and switching from 4000K to 2700K lights made the sunset scenes look absolutely magical. Different color temperatures can either enhance or wash out certain colors, so I always test different temperatures before finalizing any installation.
One of my favorite techniques is what I call the “museum method” – using multiple light sources at different angles to eliminate shadows completely. This takes some practice (and plenty of trial and error), but when you get it right, it makes artwork look like it’s glowing from within.
I once had to design lighting for a hunting lodge space where there would be trophy heads mounted on the walls at different heights. The calculations and experimentation to try and get no shadows on the trophies took some time to figure out.
It took a combination of LED Back lighting and wall washing lighting coupled with directional spot lighting. And some experimenting before actual installation to get it right.
Temperature consistency is super important too. I learned this lesson when I mixed different brands of LED lights – even though they were supposedly the same temperature, the slight variations made some artwork look oddly colored compared to others. Now I always stick to the same brand and model for consistency.
The real secret sauce is in how you combine these techniques. For example, I’ll often use the rule of thirds for my main lighting placement, then add subtle fill lights at complementary angles to soften shadows. It’s like conducting an orchestra – every light has its part to play in the final performance.
Remember, though, that these are guidelines rather than strict rules. I’ve broken every single one of these “rules” at some point when a specific piece or space called for it.
The key is understanding why these techniques work so you can make informed decisions about when to follow them and when to get creative.
Highlighting Architectural Features with Lighting for art displays
When it comes to lighting architectural features, I’ve discovered that it’s all about creating drama through contrast and shadow play.
One of my most memorable projects involved lighting a historic building’s intricate crown molding – the transformation was absolutely incredible once we got the uplighting just right.
Uplighting is like your secret weapon for emphasizing textures and shapes. I’ve found that placing LED strips or small uplights about 12-18 inches from the wall creates this beautiful wash of light that makes even simple architectural details look stunning.
The key is getting that perfect distance when lighting for art displays – too close and you get harsh spots, too far and you lose the impact.
Grazing techniques for walls and columns took me a while to master. The trick is positioning your lights really close to the surface – usually about 6-12 inches away – and aiming them almost parallel to the wall.
This creates these gorgeous shadows that emphasize every little detail in the texture. I remember using this technique on a brick wall, and suddenly every single brick looked like it had its own personality!
Silhouetting is probably my favorite dramatic effect to create. It’s amazing how placing lights behind architectural elements can transform a space.
I once lit up a series of columns from behind, and visitors kept asking if we’d done major renovations – nope, just clever lighting!
The secret is to ensure your background light is about three times brighter than your ambient lighting.
Let me tell you about incorporating light into architectural elements – this is where things get really interesting. Built-in coves and niches are like gifts from the lighting gods. I’ve learned to use LED strips with good diffusers in these spaces.
One time, I tried installing them without diffusers, and you could see every individual LED dot – definitely not the look we were going for!
Lighting Considerations for Different Art Mediums
Let me tell you – each type of artwork has its own lighting personality. I learned this the hard way when I tried to use the same lighting setup for an oil painting that I’d used for a photograph.
Total rookie move! Different mediums need completely different approaches.
For paintings, it’s all about balanced illumination and accurate color rendering. I’ve found that high-CRI LED lights (95+ CRI) are absolutely essential. They’re a bit pricier, but worth every penny.
One time, I used standard LEDs on an impressionist painting, and all those subtle purples and blues looked completely flat. Now I always test my lights with a color chart before installing them permanently.
Sculpture lighting is where you really get to have fun with shadows.
I remember working on lighting a bronze piece – it took hours of adjusting lights to get the shadows just right, but when we finally nailed it, the sculpture looked like it was alive!
The trick is to use at least three light sources at different heights and angles. This creates depth and helps viewers appreciate all the dimensional details. Lighting for art displays can take many forms when dealing with different types of mediums.
Photography has its own special challenges. Glass and glossy prints can be super tricky to light properly.
I’ve started using polarizing filters on my lights when working with photos behind glass – it’s amazing how much this reduces glare. And here’s something I wish I’d known earlier: black and white photographs often need warmer light temperatures than color photos to really make the contrast pop.
Mixed media pieces? They’re like lighting puzzles! I worked on an installation that combined metallic elements, fabric, and painted surfaces. Each material reflected light differently, so we ended up creating zones of lighting with different intensities.
I am always fascinated at the kill needed and displayed at exhibitions and gallery events. The foresight to know and put in place the perfect lighting for art displays at different exhibitions is amazing.
It’s kind of like cooking – you need to adjust the recipe for each ingredient.
Smart Lighting Solutions for Lighting for Art Displays
Smart lighting has completely revolutionized how we display art, and trust me, I was skeptical at first. But after installing my first programmable system, I was totally hooked. It’s like having a lighting assistant that never gets tired!
Programmable lighting systems are absolute game-changers.
And easily affordable for the average consumer wanting to control their lighting for art displays.
I remember setting up scenes for a client’s collection – morning light for their impressionist pieces, cooler afternoon light for modern art, and warm evening lighting for their portrait collection. The artwork literally transformed throughout the day.
Let me tell you about motion sensors – they’re not just for security anymore. I’ve started using them to create these amazing dramatic effects where artwork gradually illuminates as visitors approach. Adding drama to the lighting for art displays is easy when smart lighting is involved.
It saves energy too, which is always a bonus. Though I did have one funny incident where a cat kept triggering the sensors all night!
The whole world of colour-changing LEDs has opened up so many possibilities.
I worked on a contemporary art installation where we programmed the lights to slowly shift colors throughout the day, subtly affecting how people perceived the artwork. Just remember to use this feature sparingly – you don’t want your space looking like a disco!
Voice-controlled lighting is one of those things that sounds gimmicky but is actually super practical. I can’t tell you how many times I’ve been up on a ladder adjusting lights and wished I could just tell them to dim or brighten.
Now I can! Though I still recommend having manual controls as backup – technology isn’t perfect yet.
Common Mistakes to Avoid in Lighting for Art Displays
Oh boy, have I made my share of lighting mistakes over the years! But hey, that’s how we learn, right? Let me save you some headaches by sharing the biggest blunders I’ve encountered (and sometimes created myself).
Over-illumination is probably the most common mistake I see.
I once lit up a watercolor collection like it was under stadium lights – not good! These delicate pieces ended up fading noticeably within just a few months.
Now I know that different mediums have different light sensitivity levels, and I always use a light meter to ensure we’re within safe ranges (usually 50-200 lux for most pieces).
Creating consistent lighting across a collection is trickier than it sounds.
I remember walking through a gallery I’d lit and noticing that some pieces looked like they were spotlighted while others were practically in shadow.
The solution? I started measuring light levels at each piece and creating lighting maps to ensure even coverage. It takes more time, but the results are worth it.
Natural light is both a blessing and a curse. I learned this lesson when I installed track lighting in a room with huge windows – the artwork looked great at night but was completely washed out during the day.
Now I always consider how natural light changes throughout the day and season, and plan my artificial lighting accordingly.
Sometimes this means installing automated blinds or UV-filtering window film.
The biggest mistake of all? Focusing so much on the artwork that you forget about the overall ambiance of the space.
I once created perfect lighting for each individual piece but managed to make the room feel like a clinical examination area!
These days, I always consider how the lighting affects both the art and the people viewing it.
It’s about creating an inviting atmosphere, especially in a home that enhances both the artwork and the viewing experience.
Illuminating your art and architectural features is an art form in itself.
By mastering the techniques we’ve explored, you’ll be well-equipped to create stunning lighting for art displays that captivate viewers and bring your space to life.
Remember, lighting is not just about visibility – it’s about creating an experience. So go ahead, play with light, and watch as your art and architecture take on a whole new dimension. Who knows? Your newfound lighting skills might just spark a revolution in your home or gallery!


In it something is. I thank for the help in this question, now I will not commit such error.
Bravo, is simply excellent phrase 🙂