What is Recessed Lighting? The Beginner’s Guide to Recessed Lighting 2024
Lights, camera, action! Welcome to the dazzling world of recessed lighting, where form meets function in the most brilliant way possible. Did you know that properly installed recessed lighting can increase your home’s value by up to 1-3%? That’s right, folks – we’re not just talking about brightening up your space, we’re talking about brightening up your wallet too!
As we dive into 2024, recessed lighting has become more than just a practical solution; it’s a game-changer in home design. Whether you are building a new home or renovating your current home, get ready to shed some light on the ins and outs of this illuminating trend. Trust me, by the end of this guide, you’ll be seeing your home in a whole new light!
What is Recessed Lighting and Why Should You Care?
Alright, let’s talk about recessed lighting. When I first moved into my starter home – man, was it dark in there! The previous owners had these ancient, clunky light fixtures that looked like they belonged in a museum. I knew I needed to brighten things up, but I didn’t want to lose any headspace in my already low-ceilinged living room.
I just knew that I needed recessed lighting but what is recessed lighting exactly?
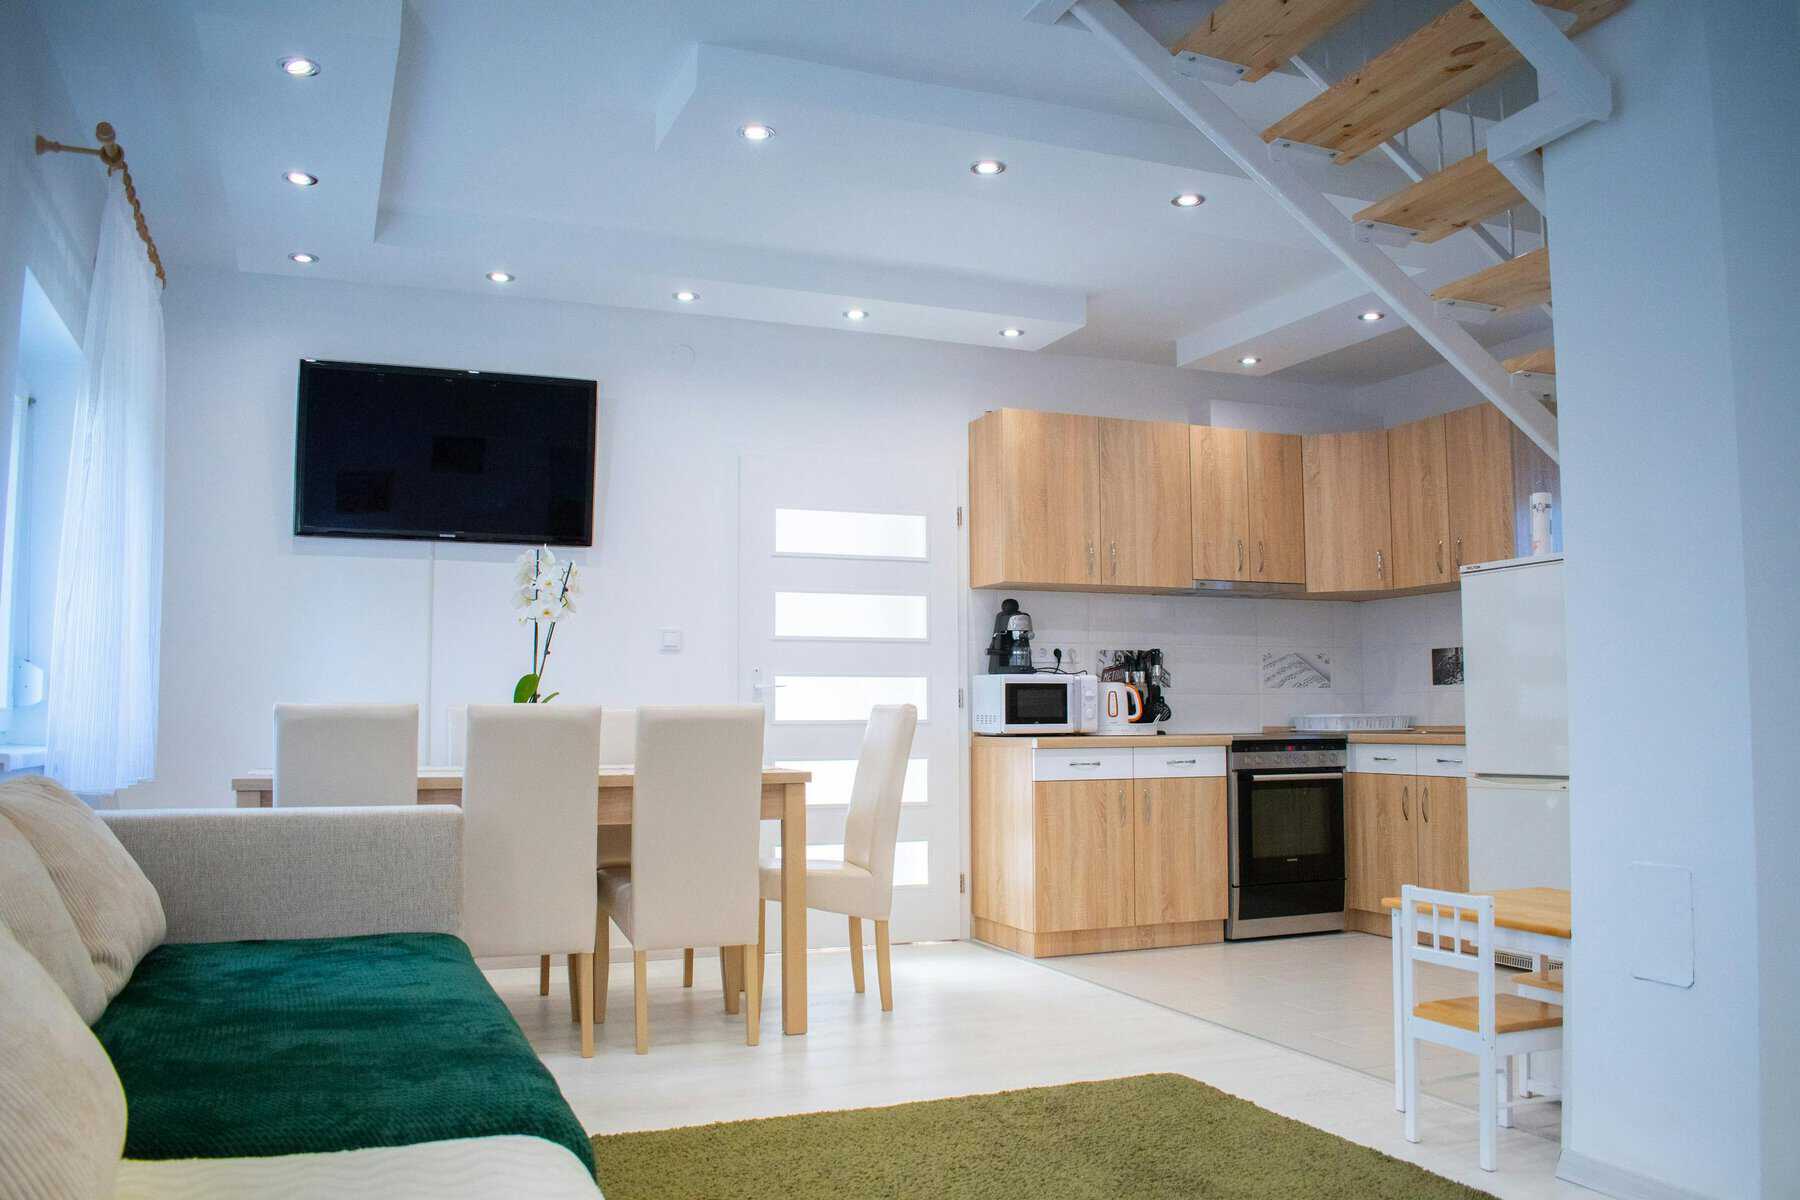
Well, it’s basically light fixtures that are installed into hollow openings in your ceiling. They’re super sleek and don’t hang down, which is why they’re sometimes called “can lights” or “pot lights” or “downlights”. The fitting sits up inside the ceiling, with just the trim visible. It’s like having secret little light ninjas hiding in your ceiling, ready to illuminate your space without drawing attention to themselves.
Now, why should you care about recessed lighting? Oh boy, where do I even start?
First off, these babies are space-savers. If you’re like me and don’t have the luxury of high ceilings, recessed lights are a godsend. They don’t take up any vertical space, so you don’t have to worry about bumping your head on a hanging fixture. Plus, they make your room feel bigger and more open.
But here’s the real kicker – the versatility. When I first got recessed lights in my living room, I had no idea how much control I’d have over the ambiance. You can use them for general lighting, task lighting, or even accent lighting. Want to highlight that fancy new painting you bought? Bam! Angle a recessed light towards it, and you’ve got yourself a mini art gallery.
I remember the first time I had friends over after installing my recessed lights. I dimmed them down low for a cosy movie night, and everyone was like, “Whoa, when did your place get so fancy?” Little did they know, it was all thanks to some strategically placed holes in my ceiling!
Now, I got to be honest – installation isn’t exactly a walk in the park. I thought I could DIY it and ended up with a ceiling that looked like Swiss cheese. Learn from my mistakes, folks. Unless you’re an qualified electrician, it is a must to call in a pro for this one. Trust me, your ceiling (and your sanity) will thank you.
But here’s a pro tip: pay attention to the colour temperature of your bulbs. I once made the mistake of putting in super cool-toned LEDs, and my living room looked like a hospital waiting room for weeks. Warm white settings are usually your best bet for creating a cosy, inviting atmosphere.
So, there you have it – recessed lighting in a nutshell. It’s sleek, versatile, and can totally transform your space. Whether you’re looking to brighten up a dark room, create some ambiance, or just modernize your home, recessed lighting might just be your new best friend. Just remember to hire a pro for installation, unless you want your ceiling looking like it got into a fight with a hole punch!
Types of Recessed Lighting: Choosing Your Perfect Match
So, you’ve decided to jump on the recessed lighting bandwagon? Smart move! But hold your horses, because there’s more to it than just poking holes in your ceiling and calling it a day. Let me walk you through the types of recessed lighting – a lesson I learned the hard way after a few, uh, let’s call them “creative” installations in my home.
First up, we’ve got the classic “new construction” recessed lights. These bad boys are meant for fresh builds or major renovations. Most often referred to as downlights here in Australia. These are the flush with your ceiling, LED’s that once installed do not require an electrician to change as they effectively are a plug and play product. The electrician installs sockets on the wiring near the holes so they can easily be installed or changed.
But what if you’re not tearing apart your ceiling? That’s where different sized and feature recessed lights come in handy. These are the ninjas of the lighting world – they can slip into existing ceilings without major surgery. When I decided to upgrade my kitchen lighting, these were my go-to. Just a small hole in the drywall, and voila! New lights without the need for a full-blown renovation.
Now, let’s talk about trims. Oh boy, did I underestimate the importance of trims when I first started out. The trim is the visible part of the light, and it can make or break your room’s look. .
Then there’s “reflector” trim, which amplifies light output. I installed these in my dimly lit hallway, and it went from dungeon to bright gallery real quick. Just be careful – I may have gone a bit overboard and now it’s like walking through a tanning salon.
Don’t forget about “gimble” or “eyeball” trims. These can be adjusted to point in different directions. I put a couple over my reading nook, and it’s like having a spotlight operator for my book club meetings. Super handy, but maybe don’t install them in your bedroom unless you want to feel like you’re under interrogation every morning.
Speaking of control, let’s chat about smart recessed lighting. This is where things get really cool. I recently upgraded some of my fixtures to smart LED versions, and now I can control them with my phone or voice. It’s like living in the future! I can dim them, change colours, set schedules – the works. Just be prepared for the inevitable “disco mode” phase where you spend way too much time playing with colour combinations.
One type I wish I’d known about earlier is “wet-rated” or “IP-Rated” recessed lights. These are designed for areas that might get damp, like bathrooms or covered porches. Learn from my mistake – regular recessed lights and steamy showers don’t mix well. Trust me, replacing water-damaged fixtures is not a fun weekend project.
Now, here’s a tip that took me way too long to figure out: pay attention to the size of your recessed lights. They typically come in 4-inch, 5-inch, and 6-inch diameters. I once bought a bunch of 6-inch lights on sale, only to realize they looked like dinner plates in my cosy den. Oops. Generally, smaller rooms do better with 4-inch lights, while larger spaces can handle the 6-inch variety. In Australia the standard downlights are just about all brands are a 90mm cut out. Making access to install easy for the tradies
Don’t forget about light temperature either. I’m talking about how warm or cool the light appears. I stick to warm white (around 2700K-3000K) for living spaces and cooler tones (3000K-4000K) for work areas. It’s all about creating the right mood, you know?
Choosing the right type of recessed lighting can seem overwhelming, but it’s worth taking the time to get it right. After all, good lighting can make your home feel like a million bucks – even if your bank account disagrees. Just remember: measure twice, buy once, and don’t be afraid to ask for help. Your future well-lit self will thank you!
Designing with Recessed Lights: From Boring to Brilliant
Let’s start with the basics: spacing. Oh boy, did I learn this one the hard way. When I first installed recessed lights in my kitchen, I thought, “More is better, right?” Wrong. I ended up with what my kids lovingly called the “airport runway” look. Not exactly the cosy culinary vibe I was going for.
Here’s the deal: for general lighting, a good rule of thumb is to space your lights about 4 to 6 feet apart (1m – 2m in Australia). But don’t just take my word for it – grab a tape measure and map it out. And don’t forget about your furniture layout! I once had a perfectly positioned light… right above where my couch was supposed to go. Rookie mistake.
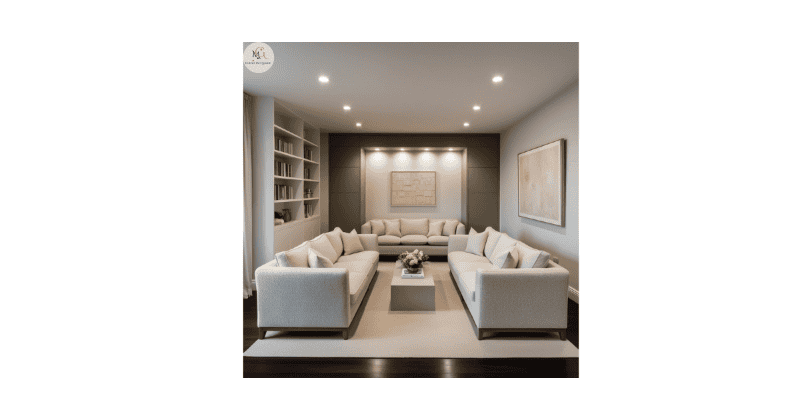
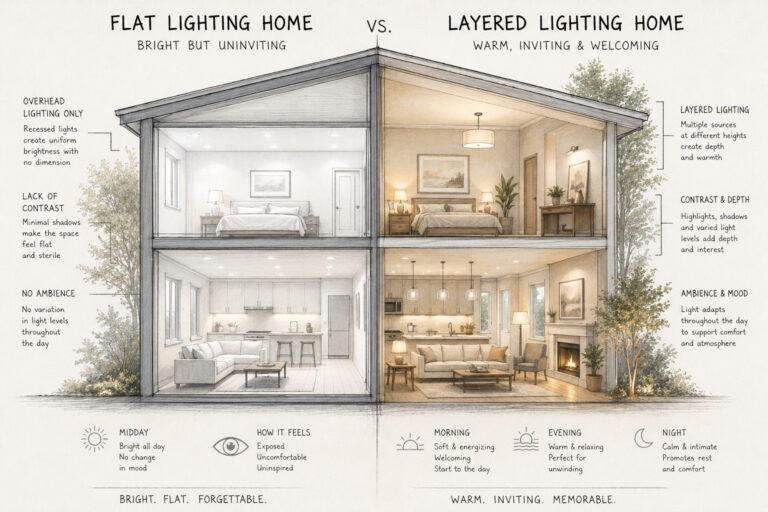
Now, let’s talk about the magic of layering. This is where recessed lighting really shines (pun totally intended). You don’t want your room to feel like it’s lit by one big, flat light source. That’s a quick trip to Boring Town, population: you. In the building trade we usually refer to the downlights as your blanket light, splashing light over your whole space.
Instead, think in layers. I use recessed lights for my general ambient(blanket) lighting, but then I add in some task lighting over my kitchen island and accent lighting to highlight my (somewhat questionable) art collection. It’s like conducting a light orchestra – when everything’s in harmony, it’s beautiful.
One cool trick I learned is using wall-washing. This is where you position recessed lights close to a wall to create a wash of light down the surface. I did this in my narrow hallway, and bam! It instantly felt wider and more inviting. No more walking down the hall feeling like I’m in a horror movie.
But here’s the thing – don’t go overboard. I once got so excited about my new lighting skills that I turned my bedroom into a light show. Romantic? Not so much. Migraine-inducing? Absolutely. Remember, sometimes less is more. And lamps can sometimes do the job too.
Let’s chat about dimmers for a sec. If you take away one thing from this rambling, let it be this: install dimmers. Seriously. It’s like having a magic wand for your room’s ambiance. Movie night? Dim the lights. Trying to wake up on a Monday morning? Full brightness, baby. It’s a game-changer.
Now, here’s a mistake I made that you can learn from: ignoring the ceiling. Your ceiling is like a canvas, and recessed lights are your paintbrush. In my dining room, I originally just plonked a bunch of lights in a grid pattern. Boring with a capital B. But then I got creative – I used recessed lights to create a subtle pattern on the ceiling. Now it’s a conversation starter at dinner parties. Who knew ceilings could be so interesting?
In saying that the most common question I ask when talking to a client while doing a lighting plan is: “How OCD are you?” because if your lights in the ceiling don’t make sense to you, it will drive you crazy. Not what you need when you have spent all this money on a new home or expensive renovation
Oh, and don’t forget about the trim colour! This is something I overlooked at first. The trim is the visible part of the light fixture, and it can either blend in or stand out. In my minimalist home office, I went with white trims that disappear into the ceiling. But in my more eclectic living room? I chose black trims for a bit of contrast. It’s like eyeliner for your ceiling – a little can go a long way.
Here’s a pro tip: consider the beam spread of your lights. Narrow beam spreads are great for highlighting specific areas or objects, while wider beams are better for general lighting. I use narrow beams to showcase my bookshelf (gotta show off those unread classics), and wider beams for overall room illumination.
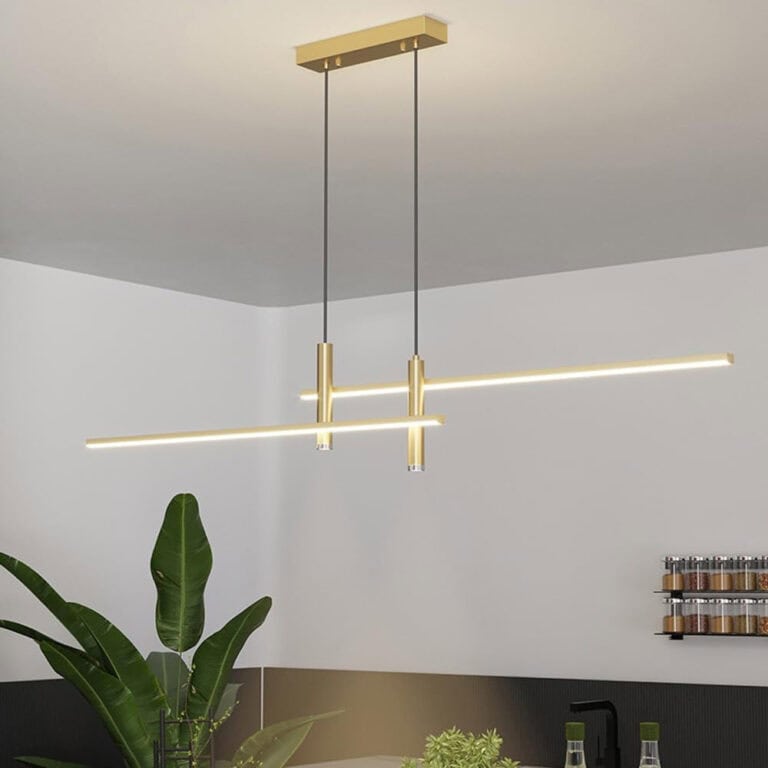
Lastly, don’t be afraid to mix and match. Recessed lights don’t have to do all the heavy lifting. I combine mine with pendant lights over my dining table, a couple of funky floor lamps in the living room, and some wall sconces in the bathroom. It’s all about creating depth and interest.
Installation 101: DIY or Call the Pros?
Can you DIY installation? Let’s talk about installing recessed lighting. This is a topic that’s near and dear to my heart. As a Lighting Designer I will always recommend you use an electrician to install any new lighting.
First things first: DIY. Now, I’m all for a good home improvement project. Heck, I once built a bookshelf that only wobbles a little bit. But recessed lighting? That’s a whole different ballgame. In Australia electrical works are governed by building codes so you don’t want to mess with that.
One of the main reasons to always leave wiring work to the pros is your home insurance. I don’t know about other countries but here in Australia if your insurer finds out you DIY any of your electrical or plumbing they will NOT cover your house insurance even if it is not an electrical issue. Not a chance you want to take.
Also here’s the thing about DIY recessed lighting: it’s not just about cutting holes and connecting wires. You’ve got to worry about insulation, electrical codes, and not electrocuting yourself. Fun times, right? There’s a reason electricians spend years training.
The pro route definitely has its perks. For starters, they know what they’re doing. Novel concept, right? They understand all those pesky things like building codes and proper wiring. Plus, they’ve got the tools. I mean, have you seen some of the gadgets these folks carry around? It’s like Batman’s utility belt, but for lighting.
Another big advantage of going pro is speed. What took me a whole weekend of cursing and patching holes, this electrician knocked out in a few hours. And the result? Chef’s kiss. Everything was evenly spaced, perfectly aligned, and actually worked. Imagine that!
But let’s address the elephant in the room: cost. Yeah, hiring a pro isn’t cheap. I nearly choked on my coffee when I saw the quote. But here’s the thing – when you factor in the cost of materials, tools, and your sanity, it might not be as bad as you think. Plus, many offer warranties on their work. Peace of mind? Priceless.
Here’s a little secret: even if you decide to go the pro route, you can still save some cash by doing the prep work yourself. I’m talking about things like measuring and marking where you want the lights, or even cutting the holes if you’re feeling adventurous. Just make sure you clear it with your electrician first. They might have some thoughts on your, uh, creative placement choices.
One thing I wish I’d known earlier: if you’re building a new home or doing a major renovation, that’s the perfect time to install recessed lighting. It’s way easier (and cheaper) to do it when the walls and ceilings are open. I learned this lesson after I’d already finished my basement. Oops.
When looking for a professional, specialty lighting stores will always have electricians that they can recommend. Or a good referral from a friend is always good.
Recessed Lighting for Different Rooms: Tailored Solutions
Lets dive into recessed lighting for different rooms. I’ve learned a thing or two about this after playing lightbulb roulette in every room of my house. Buckle up, ’cause we’re about to take a tour of my lighting mishaps and triumphs!
First stop: the kitchen. Oh boy, did I mess this one up at first. I thought, “Hey, kitchens need to be bright, right?” So I went overboard and installed enough lights to land a plane. Big mistake. I felt like I was cooking in an operating room.
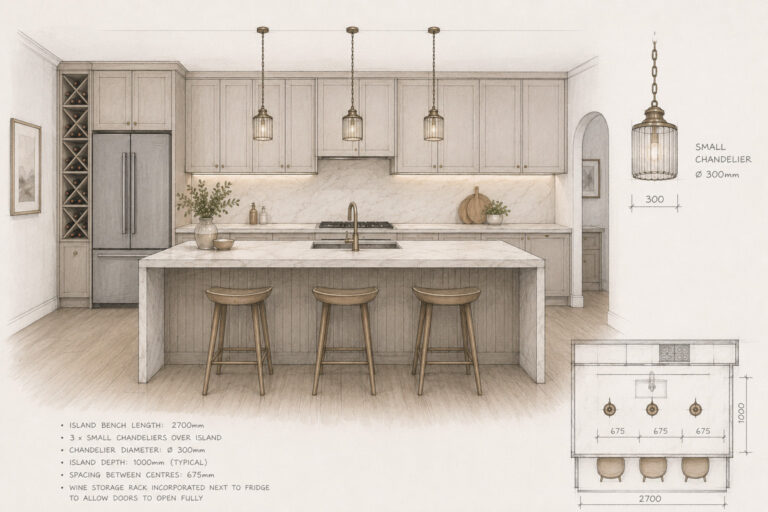
Here’s what I Know: in the kitchen, it’s all about task lighting. You want to focus on work areas like countertops and the stove. I ended up with a mix of 90mm lights over the general area and 75mm lights aimed at my cutting board and cooktop. Now I can chop veggies without losing a finger and actually see if my chicken is cooked through. Win-win!
Moving on to the living room. This is you can flex your lighting muscles. The key here is flexibility. You want to be able to go from “Netflix and chill” to “where did I put my reading glasses?” at the flick of a switch.
I installed 90mm lights around the perimeter of the room for general illumination, and then added a couple of adjustable recessed lights to highlight my art collection (aka my kids’ finger paintings). The game-changer? Dimmers. Now I can set the mood for movie night or crank it up when I’m trying to find that Lego piece that’s been stabbing my foot.
Next up: the bathroom. Let me tell you, bad lighting in the bathroom is a recipe for disaster. I learned this the hard way when I showed up to work looking like a clown after doing my makeup in shadow-city.
The trick with bathroom lighting is to eliminate shadows. I recommend the gimbled recessed lights as you can angle them to hit the mirror and reflect back onto your face eliminating all the shadows. Just make sure you get wet-rated fixtures if they’re going near the shower. Trust me, water and electricity aren’t mixer buddies you want at your party.
In bedrooms, less is more. Downlights on a dimmer circuit, I can have them bright when I’m getting dressed (no more mismatched socks!), but dim them down for a relaxing vibe at night. Pro tip: avoid putting a light directly over the bed unless you enjoy feeling like you’re under interrogation.
Don’t forget about closets! I ignored my closet lighting for years, and getting dressed was like playing a daily game of “guess the colour.” A couple of small recessed lights made a world of difference. Now I can actually see that my black socks are, in fact, navy blue.
Lastly, let’s chat about the home office. This is where I spend most of my day, so getting the lighting right was crucial. After a few weeks of squinting at my computer screen, I figured out the secret: indirect lighting.
I installed recessed lights around the perimeter of the room, aiming them at the walls. This creates a nice, diffused light that doesn’t cause glare on my computer screen. I also added a directional recessed light over my desk for when I need to read physical documents (yes, they still exist!).
One final tip: don’t forget about colour temperature. I used cooler lights (around 4000K) in my office to keep me alert, but warmer lights (2700K-3000K) in living spaces and bedrooms. It’s like having a built-in productivity booster!
Remember, lighting isn’t one-size-fits-all. What works in one room might turn another into a cave – or a spotlight. Don’t be afraid to experiment, but maybe start with one room at a time. This is where the best advice is a game changer. If they ask you all the right questions about how you will use each room then you are on a winner.
Energy-Saving Tips: Illuminate Wisely
Choosing energy-efficient bulbs and fixtures is all about saving energy with recessed lighting. This is a topic close to my heart – and my wallet. I used to think energy efficiency meant living in a dim cave, but boy, was I wrong.
First things first: LEDs are your new best friend. I remember when I first switched from those old-school incandescent bulbs to LEDs. My electric bill dropped so fast, I thought the power company had made a mistake! Seriously, it was like magic. But here’s the kicker – I was sceptical at first. I mean, who wants their living room to look like a sterile doctor’s office, right?
Well, let me tell you, LED technology has come a long way. Now you can get LEDs in all sorts of warm, cosy colours. I’ve got my living room decked out in soft, warm white LEDs, and it feels like I’m bathed in candlelight – minus the fire hazard.
But here’s a pro tip: pay attention to the lumens, not just the wattage. I once bought a bunch of super low-wattage LEDs, thinking I was being ultra-efficient. Turns out, they were about as bright as a glow worm. Now I look for that sweet spot of low wattage and high lumens. It’s like having your cake and eating it too – bright lights and low bills.
Now, let’s talk about dimmers. Oh man, dimmers are a game-changer. I installed them in pretty much every room, and it’s like having a superpower. Not only can I set the perfect mood for any occasion, but I’m also saving energy when I don’t need full brightness. Just make sure you get dimmers that are compatible with LED products. It is not one size fits all as I found when my lights started flickering like a haunted house.
Here’s something I wish I’d known earlier: the colour of your walls and ceiling matters. I used to have dark walls in my home office, and I was cranking up the lights just to see my keyboard. Once I painted the walls a lighter colour, I could use lower wattage bulbs and still see just fine. It’s like my walls became reflectors, bouncing light all around the room. Energy saved and a fresh new look – win-win!
Oh, and don’t forget about natural light! I used to have my recessed lights on full blast all day, even when the sun was shining. Rookie mistake. Now I’ve got light sensors that adjust my recessed lighting based on how much natural light is coming in. It’s like having a smart lighting assistant that never takes a coffee break.
Here’s a tip that might sound counterintuitive: sometimes, using more fixtures can actually save energy. I know, it sounds crazy, but hear me out. In my kitchen, I used to have a few super bright lights trying to illuminate the whole space. Now I’ve got more fixtures, but each one is a lower wattage. The result? Better light distribution and lower energy use. It’s like the lighting equivalent of dividing and conquering.
Remember, saving energy doesn’t mean living in the dark. With a little planning and some smart choices, you can have a well-lit home that doesn’t break the bank. It’s all about working smarter, not harder – or in this case, brighter, not pricier. Now if you’ll excuse me, I’m off to bask in the warm glow of my energy-efficient paradise. Happy lighting, folks!
Maintenance and Troubleshooting: Keeping Your Lights Bright
• Regular cleaning and bulb replacement tips. Like any product your lights will last longer and perform better with regular cleaning. Which for most downlights it is just a swipe of a duster.
• Addressing common issues like flickering or buzzing, this means you have a faulty LED or the incorrect type of dimmer attached to your lights. An easy fix to replace.
• Upgrading older recessed lighting systems in todays energy efficient climate is a must. The new downlights do not need clearance from insulation the technology now is incrementing yearly. In my 10 years in lighting the advancements are incredible. It is definitely worth the investment to upgrade any old recessed lighting to what is now available.
• Safety precautions when working with electrical fixtures is paramount as being electrocuted will land you in hospital not fun. Turn off all power before starting anything. But most importantly leave electrical work to the electricians they know what they are doing.
And there you have it, folks – the bright and beautiful world of recessed lighting laid bare! From choosing the perfect fixtures to creating a masterpiece of illumination in your home, we’ve covered it all.
Remember, good lighting isn’t just about banishing shadows; it’s about creating an atmosphere, enhancing your space, and quite possibly, boosting your property value. So why wait? It’s time to take the plunge and recess your way to a brighter, more beautiful home.
Whether you’re ready to DIY or calling in the pros, the perfect lighting scheme is just a few fixtures away. Let’s make 2024 the year your home truly shines – both literally and figuratively! Ready, set, glow!


My partner and I stumbled over here different web
address and thought I may as well check things out. I like
what I see so now i’m following you. Look forward to checking out your web page for a second time.