Budget Friendly Kitchen Island Lighting: Style Without Breaking the Bank

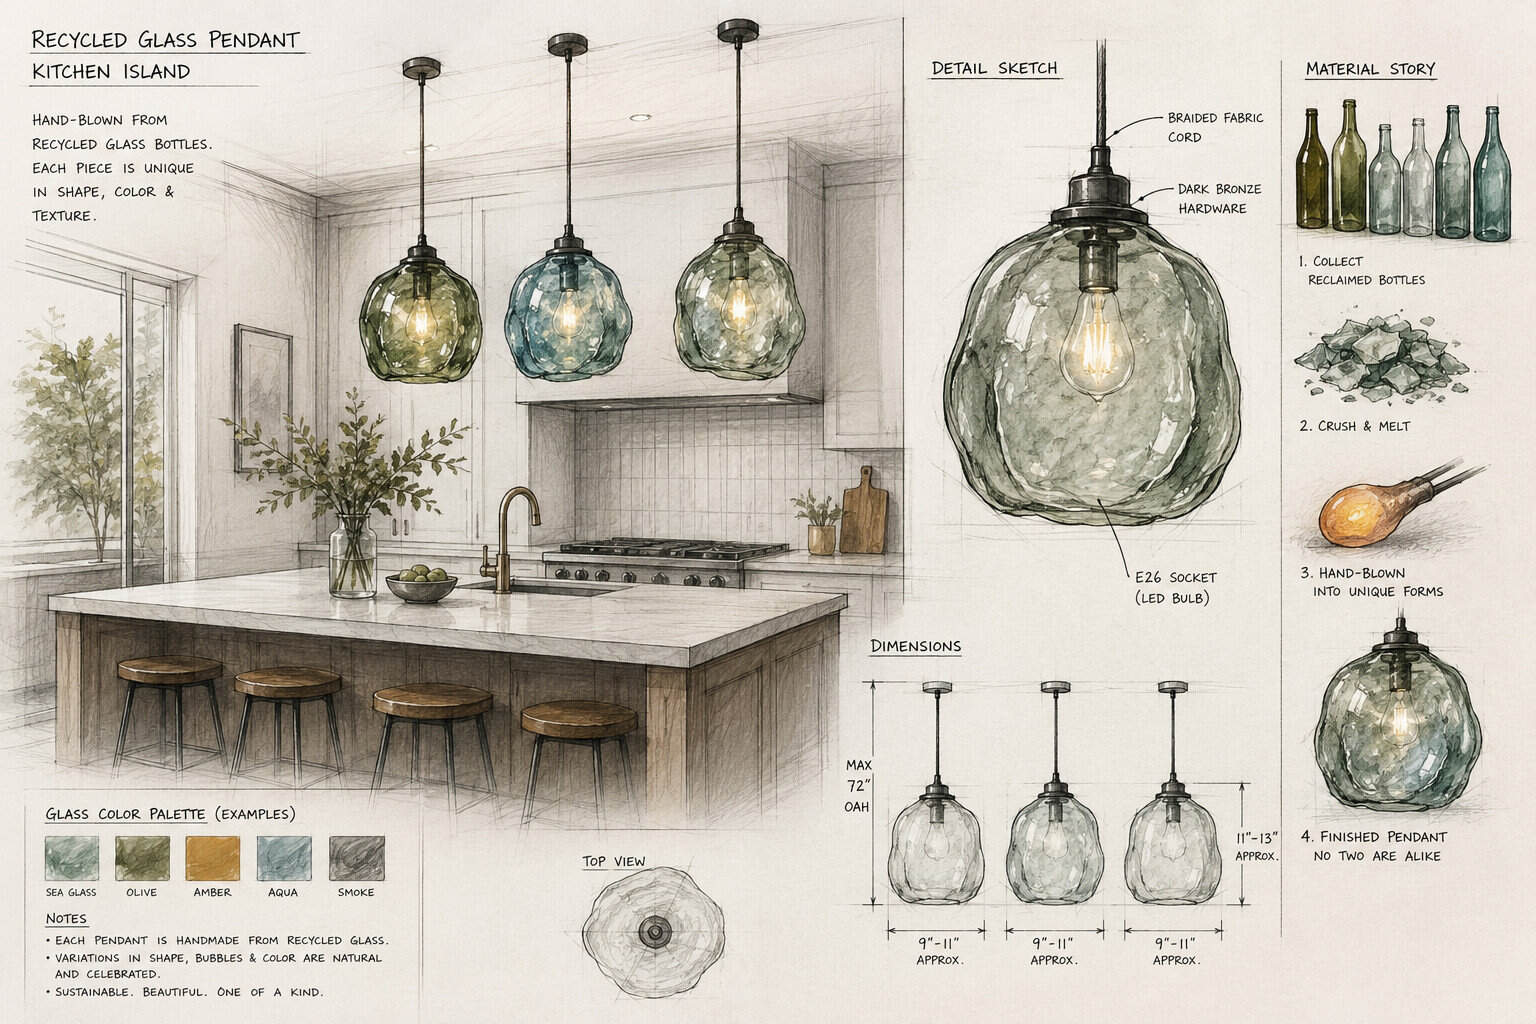
Think beautiful kitchen island lighting has to cost a fortune? Think again! As a kitchen design consultant, I’ve discovered that some of my clients’ favorite lighting transformations cost less than $900! So lets look at some Budget Friendly Kitchen Island Lighting options.
Here’s an eye-opening stat: home renovation data shows that savvy shoppers are saving an average of 62% on premium-look lighting by shopping during seasonal sales and exploring alternative materials.
I’m excited to share my insider secrets for creating that high-end look without the designer price tag. Let’s explore how to illuminate your kitchen island beautifully while keeping your wallet happy!
Budget Friendly Kitchen Island Lighting Styles
Right, let’s talk money, because lighting fixtures can get seriously pricey if you’re not careful. I learned this the hard way when I fell in love with a pendant light that was going to cost me nearly $1,000 a pop, and I needed three of them over my island. My husband gave me that look, you know the one, and I went back to the drawing board.
Turns out contemporary lighting doesn’t have to break the bank at all. I found some gorgeous glass globe pendants for under $150 each, and honestly they look just as good as the designer versions once they’re up. Clean lines, brushed metal finishes, nothing fussy about them.
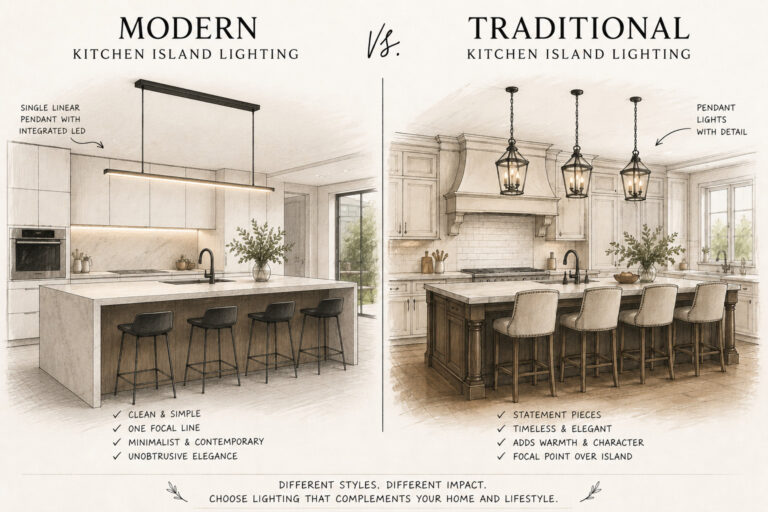
For modern minimal, flush mount discs are your best mate, they’re cheap because there’s less material and less design work involved. And traditional style lovers, don’t sleep on op shops and Facebook Marketplace, I picked up a genuine brass chandelier for $150 that would’ve cost $2,000 new.
My biggest tip, and I mean this one truly, is to buy the fixture first and worry about matching your tapware later, or don’t match it at all. Chasing a “perfect matchy” kitchen is where most people blow their budget for nothing. Which can mean the your Budget friendly Kitchen Island lighting will end up costing more if not careful.
Where to Find the Best Deals
Okay, so once you know what style you’re chasing, the real hunt begins, and this is where I’ve made every mistake in the book so you don’t have to. Facebook Marketplace has been an absolute goldmine for me, but you’ve gotta be quick, the good stuff goes within hours not days. I’ve got alerts set up for “pendant light” and “chandelier” in my area and it’s saved me so much cash over the years.
eBay’s and TKmax are also worth checking, especially for chasing down a specific brand you’ve seen elsewhere at full price. Just factor in postage costs before you get excited, because sometimes a “bargain” light fitting turns into $350 once shipping’s added on. Learned that one the expensive way.
For big box stores, Bunnings and Beacon Lighting both run clearance sections that don’t get nearly enough attention. I always duck down the back aisles first now, that’s usually where the ex-display and slightly-scratched stock gets shoved. Kmart and Big W are brilliant for modern minimal and contemporary styles too, cheap as chips and they refresh their range constantly.
Outlet shopping is a bit hit and miss depending where you live, but factory outlets for lighting brands do exist and the markdowns can be huge, sometimes 50-70% off. Timing matters heaps as well. End of financial year sales in June and the pre-Christmas and Black Friday period are when retailers are desperate to move stock, and that’s when I do most of my big lighting purchases.
Reject Shop and other discount retailers are worth a squiz for smaller accent pieces too, like little accent lamps or bulbs. Just don’t expect them to have your main statement piece, that’s not really their game. Finding your Budget Friendly Kitchen Island Lighting will be a journey to find not only the right lighting but the right price for you.
Money-Saving Material Choices
Let me tell you about the first kitchen I ever lit on a tight budget. I fell in love with a hand-blown glass pendant that cost $400 each, and I needed three of them. Yeah, that wasn’t happening.
So I spent a whole weekend walking lighting aisles and touching everything. What I learned is that the material matters way more than the brand name on the box. Here’s what actually saved me money without making the kitchen look cheap.
- Durable plastic alternatives
Acrylic and polycarbonate shades get a bad rap, and honestly, some of it is earned. I once bought a cheap acrylic pendant that yellowed within about two years because it sat next to a hot halogen bulb. Total bummer.
Here’s the fix: pair plastic shades with LED bulbs, since they run much cooler. Polycarbonate is the tougher option, and it usually costs $80 to $100 per shade, compared to $400 or more for real glass.
Budget friendly Kitchen Island Lighting is not budget if you need to replce it within 2 years because it didnt last.
- Affordable metal finishes
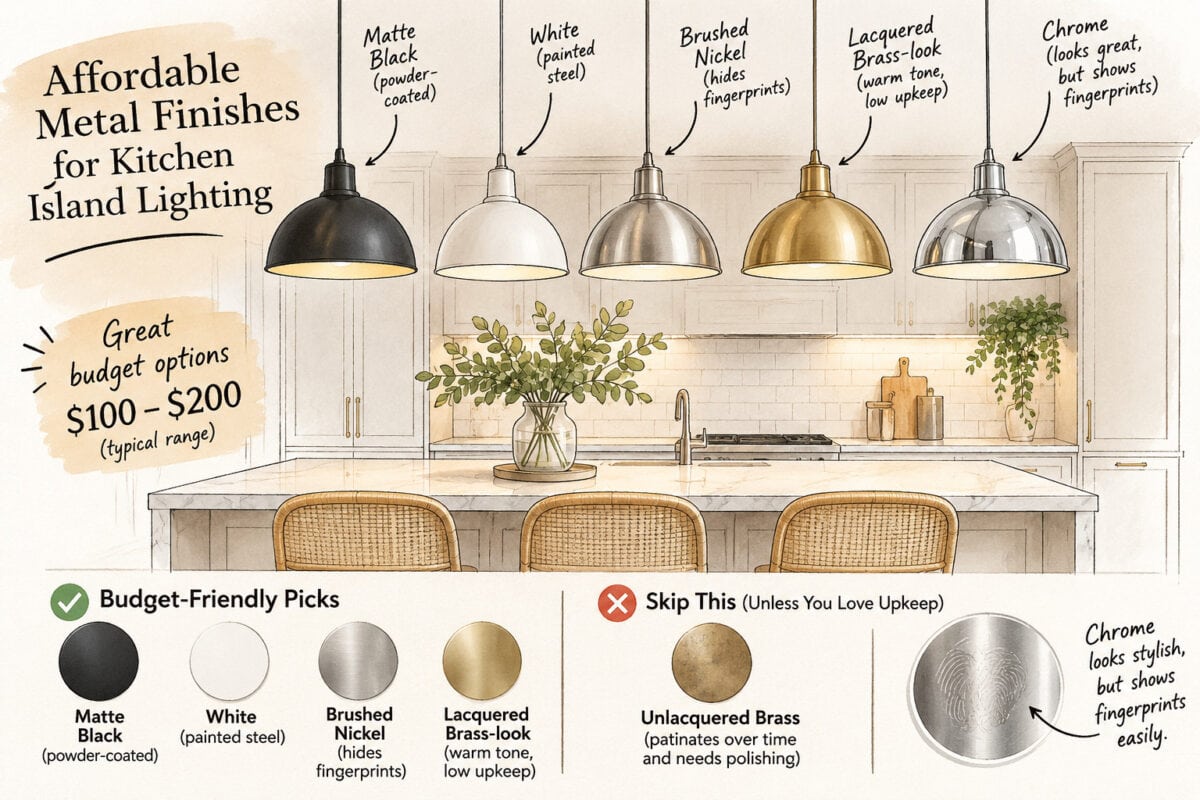
Solid brass and copper fixtures can get pricey fast. A powder-coated or painted steel fixture in matte black or white often runs $100 to $200 and looks great in most kitchens. Brushed nickel is another wallet-friendly pick, and it hides fingerprints better than chrome (which I learned the hard way with a toddler in the house).
Just skip “unlacquered” brass unless you enjoy polishing. It patinas over time, which is pretty, but not everybody wants that. A lacquered brass-look finish gives you the warm tone without the upkeep.
- Budget-friendly glass options
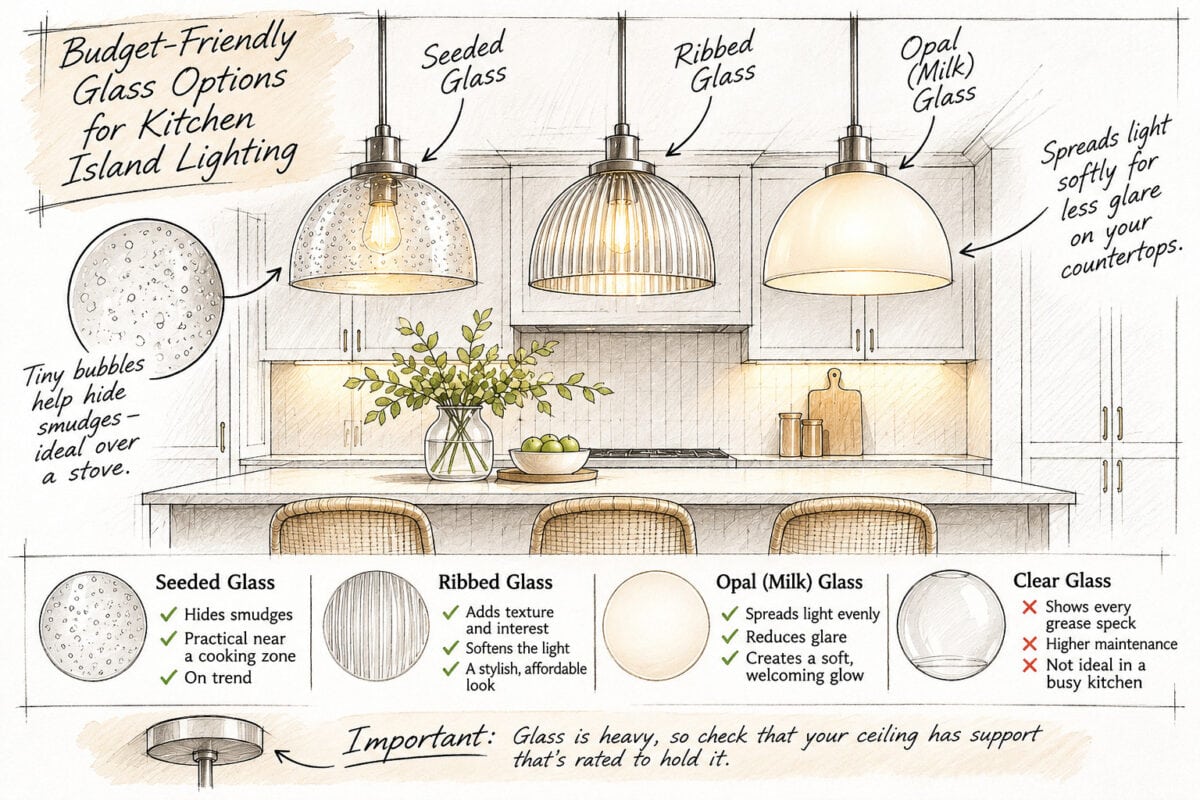
Seeded glass, ribbed glass, and opal (milk) glass are allexperiencing a resurge in the market. Seeded glass has tiny bubbles that hide smudges, and that’s a huge win over a stove. Clear glass shows every grease speck, so I’d steer away from it in a busy cooking zone.
Opal glass also spreads light softly, so you get less glare on your countertops. Keep in mind that glass is heavy, so check that your ceiling has support that is rated to hold it.
- Mixed material solutions
This is my favorite trick, and I use it all the time. A metal frame with a glass or plastic insert usually costs less than a full glass fixture, but it still looks layered and custom. Think black metal cage with a frosted shade inside.
You can also mix on purpose. Put the pricier piece over the island, where everyone looks, and pick simpler fixtures for the sink or pantry. Nobody stares at a pantry light and thinks “cheap.”
- Cost-effective shade materials
Woven rattan, wicker, and linen drum shades are often just $60 to $100 and can make a kitchen feel warm right away. The catch? Fabric and natural fibers soak up cooking grease and steam, so they need some distance from the stove, about 4 to 5 feet is a safe rule of thumb.
If you love the look but cook a lot, go with a wipeable coated shade instead. And here’s my honest mistake: I once hung a paper shade over a range, and it looked sad in about three months. Live and learn, right?
One last tip before you shop. Check the bulb type listed on the package, and grab 2700K to 3000K LEDs so the light feels cozy. A $50 pendant with the right bulb beats a $200 one with the wrong one, every single time.
Smart Shopping Strategies
Here’s a confession. I once paid full price for a set of three island pendants, hung them, and then found the exact same fixtures for $46 less each two weeks later. I wanted to scream into a throw pillow. That wasn’t budget friendly kitchen island lighting if I paid full price.
After that little disaster, I got a lot more strategic about how I shop for lighting. Where you buy matters almost as much as what you buy. Here’s what I do now.
- Price comparison tools
Before I click “buy” on anything, I check at least three places. Google Shopping is my starting point because it lists a bunch of retailers side by side. For Amazon items, a price history tracker like CamelCamelCamel shows whether that “sale” price is actually a deal or just a Tuesday. Because we really want this tio be our budget friendly kitchen island lighting.
- Bulk purchase savings
Kitchens usually need more than one fixture, so buying a matched set can save real money. Some retailers knock 10 to 15 percent off when you grab multiples, but you often have to ask. Just send a quick chat or email and see what they say (the worst answer is no). Lately suppliers are releasing Budget Friendly Kitchen Island Lighting Box Sets at very reasonable prices.
Buying everything at once also keeps your finishes matching. Metal finishes can vary a little from one production batch to the next, and a black pendant bought in March might not match one bought in September. I’ve seen it, and it’s noticeable over an island.
- Floor model discounts
Showrooms and home improvement stores need to clear their display fixtures to make room for new stock. Discounts of 10 to 30 percent are common, though it depends on the store. Politely ask a manager, because those deals aren’t always marked.
Check the fixture carefully before you commit. Look for scratches, loose canopies, and missing hardware, and make sure the wiring and socket are intact. If a piece is missing a chain or a mounting plate, get that in writing.
- Deleted Range opportunities
Deleted range opportunities can be your life saver in the budget friendly kitchen island lighting space. All you need to do is ask the retailer which lines are deleted and therefore discounted most times by 50%.
And then it is a matter of sourcing from other company stores the ones you want.
- Return policy considerations
A cheap price means nothing if you’re stuck with a fixture you hate. Before buying, read the return window, which is often 30 days but can be shorter. Ask about restocking fees, since these can run 15 to 25 percent on some items.
Watch out for special order and custom finish items, because those are frequently final sale. Heavy fixtures can also cost a lot to ship back. My rule is simple: if I can’t return it easily,It may not be that budget friendly kitchen island lighting after all.
One last thing. Hold a photo of your kitchen next to the product images, or better yet, order a sample if the store offers one. Saving $40 is great, but not if it means buying twice.
Maintenance and Longevity
I’ll never forget the first time I took down a kitchen pendant to clean it. The inside of that glass shade had a sticky, yellowish film I didn’t even know was there. Two years of cooking grease had been quietly coating it, and the light was noticeably dimmer than when I’d hung it. That is not so much Budget friendly kitchen Island lighting as it had to be replaced earlier that I wanted to.
That was a wake-up call, honestly. A little regular care keeps your fixtures looking sharp and working longer, and it saves you from buying replacements. Here’s what I do now. So making sure your Budget friendly kitchen island lighting is easy to maintain can be crucial.
- Cleaning best practices
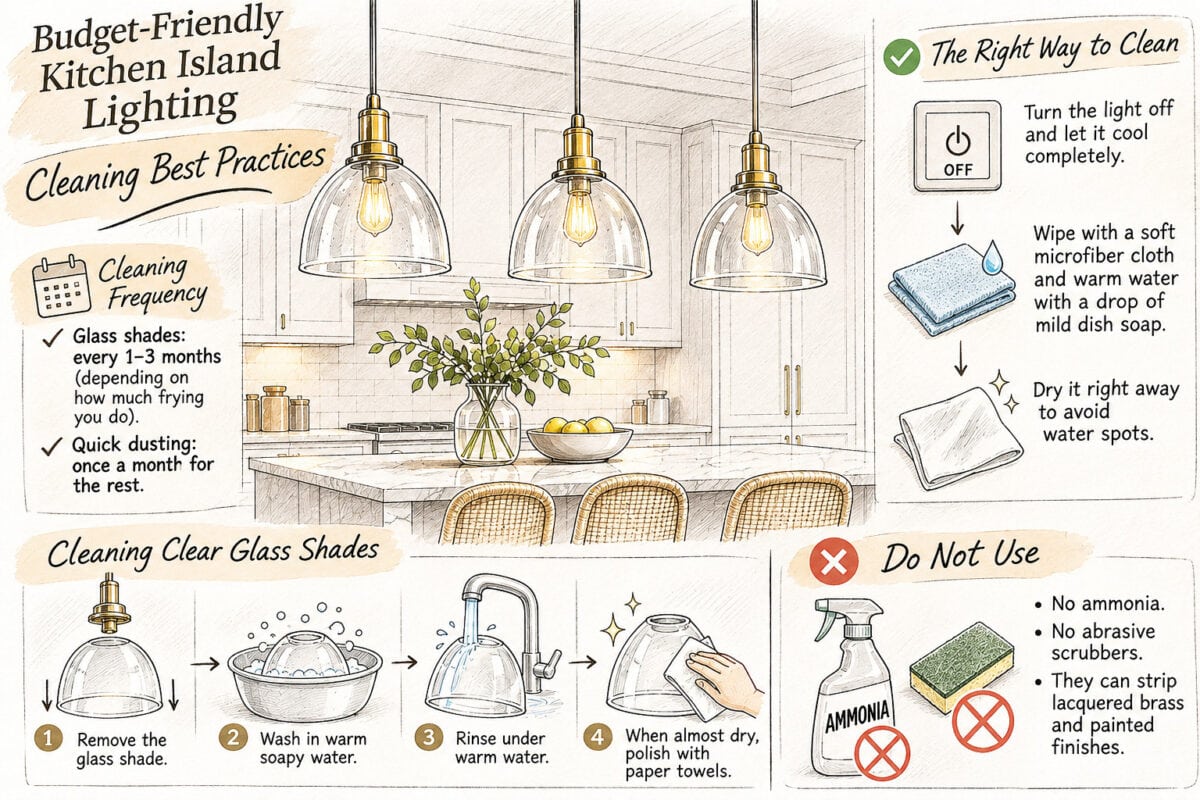
Always turn the light off and let it cool completely before touching it. Then wipe with a soft microfiber cloth and a little warm water with a drop of mild dish soap. Dry it right away so you don’t get water spots.
Kitchen fixtures can pick up grease fast, so I clean glass shades every one to three months, depending on how much frying goes on. But most grease like substances is not actually grease it is usually dust and moisture mixed, so For clear glass the best way to clean is to remove glass shade and wash in warm soapy water, rinse under warm water and when almost dry polish with paper towels.
A quick dusting once a month is usually enough for the rest. Do Not Use harsh stuff like ammonia or abrasive scrubbers, since they can strip lacquered brass and painted finishes.
- Bulb selection tips
Check the fixture label for the maximum wattage and the base type, which is usually E26 (standard) or E12 (candelabra). LED bulbs run much cooler and typically last around 15,000 to 25,000 hours. At three hours a day, that’s more than a decade for the lower number.
For kitchens, I go with 2700K to 3000K and a CRI of 90 or higher so food and countertops look natural. An 800-lumen bulb is roughly the same brightness as an old 60-watt one. If you use a dimmer, buy bulbs marked “dimmable,” or you’ll get that annoying flicker. This is the best way to make your budget friendly kitchen island lighting pop for your space.
- Preventive care tricks
Once a year, I do a quick check with the power off. I look for loose canopy screws, wobbly chains, and any cracked or discolored sockets. It takes ten minutes, and it’s amazing what you catch.
Steam and heat are the enemy, so run your range hood whenever you cook even if you are just boiling water. If a bulb flickers or buzzes, don’t ignore it, because that can point to a loose connection or a mismatched dimmer. Keep spare bulbs on hand too, so you’re not making a panicked store run mid-dinner (been there).
- Repair versus replace
But if the wiring looks scorched or the fixture gets hot to the touch, stop using it and call an electrician. Old, outdated fixtures may also lack the safety ratings that newer ones carry. Sometimes replacing is just the smarter move, and in the end will ultimately be the budget friendly kitchen island lighting.
- Warranty considerations
Warranties vary a lot, so read the fine print before you buy. Many fixtures come with a one-year warranty, while LED bulbs often carry three to five years. Finishes are frequently covered for less time, and normal wear usually isn’t included.
I keep a folder with receipts, model numbers, and a few photos of each installed fixture. Register the product online if the brand offers it. And hold onto the original box for the first few weeks, since returns and claims go a lot smoother with it.
Style Tips for Budget Friendly kitchen island Lighting
My first budget friendly kitchen island lighting looked great in the store and a little off once it was up. I’d hung three inexpensive pendants way too close together, and they crowded each other like folks on a subway. I ended up taking them all down and starting over, which cost me an entire Sunday.
Here’s the thing: good placement and smart styling make a $100 fixture look like a $500 one. Bad placement does the opposite, even with pricey lights. These are the budget friendly kitchen island lighting tricks I lean on now.
- Color coordination tricks
Pick two or three finishes for the whole kitchen and stick with them. I like matching the pendants to something already in the room, like cabinet hardware, the faucet, or the stools. That one move makes the space feel planned instead of thrown together.
A handy guide is the 60-30-10 idea. Let one finish do most of the work, add a second for balance, and use a third as a small accent. Black and brushed brass are a classic pairing, and it’s easy to find both at low prices.
- Spacing guidelines
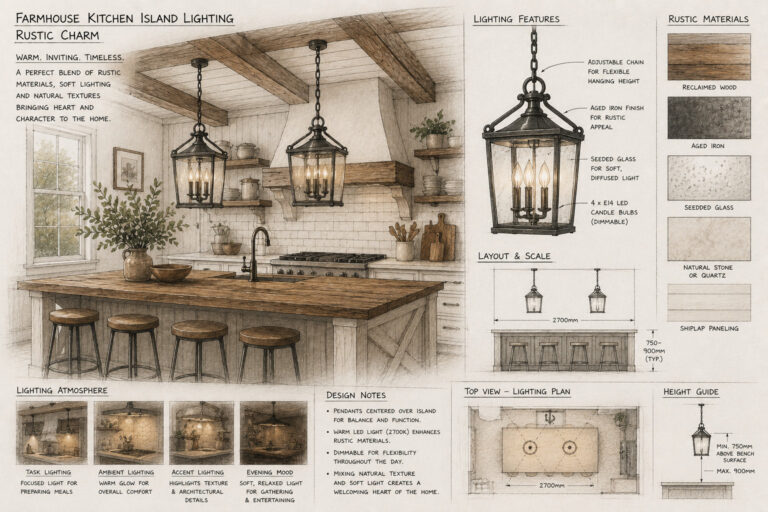
For island pendants, space them about 600 – 700 mm apart, measured center to center. Leave roughly 150 – 300 mm between the end fixtures and the edge of the island so they don’t look like they’re falling off. On a standard 1800mm island, that usually means two larger pendants or three smaller ones.
Grab painter’s tape and mark the spots on the ceiling before you drill anything. Trust me on this one. Standing on the floor and squinting at tape beats guessing every time. This is one of the most effective ways to make sure your budget friendly kitchen island lighting hits the spot.
- Height adjustment tips
Hang pendants so the bottom sits about 600 – 700 mm above the countertop. That keeps the light out of eyes while still leaving a clear view across the island.
Adjustable cords and chains are a budget-friendly lifesaver here. Get the height wrong, and you can fix it in a minute instead of rewiring. Also, have the tallest person in your house stand at the island and tell you if the light bugs them.
- Grouping strategies
Odd numbers usually look better, so three pendants over a long island tend to feel balanced. Two work great on a smaller island, as long as they’re a bit larger. Clustering many small fixtures at different heights can look fancy, but it takes more planning, and cheap ones can end up looking cluttered.
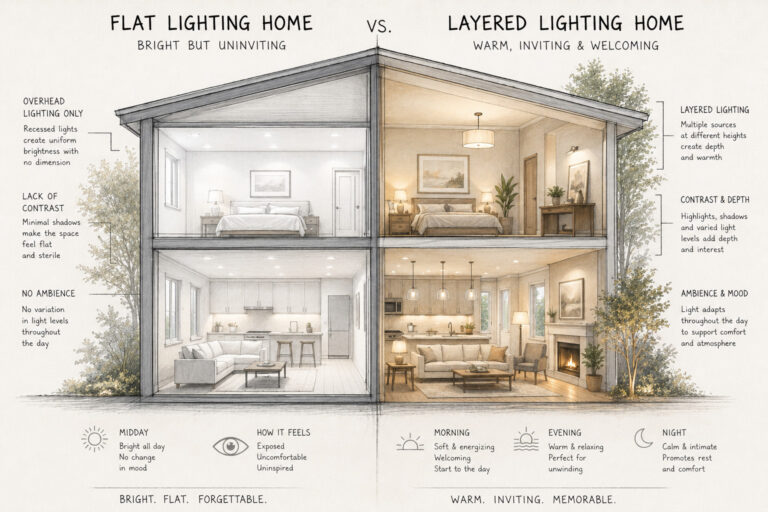
Don’t forget the rest of the room. Pendants give you a nice glow, but you’ll still want task lighting, like under-cabinet LEDs, over your prep areas. Otherwise, you’ll be chopping onions in your own shadow.
Remember that using budget friendly kitchen island lighting does not mean skrimping on size and number balance is the result we want.
- Mix-and-match approaches
You can mix styles without making a mess if you keep one thing constant. Try the same finish with different shapes, or the same shape in two finishes. That shared element ties everything together. Budget friendly Kitchen island lighting can be effective and budget friendly with just a bit more effort that=n walking into a store.
For example, I’ve paired matte black pendants over the island with a simple recessed downlight near the sink. It looked intentional, and the downlight cost under $40. Just keep the bulb color consistent, about 2700K to 3000K across every fixture, so the whole kitchen glows the same warm tone.
Creating a beautifully lit kitchen island doesn’t require a luxury budget! By combining smart shopping strategies, and our recommended affordable fixtures, you can achieve that designer look for less.
Ready to transform your kitchen island lighting? Start by setting your budget and exploring our cost-effective suggestions to find the perfect balance of style and savings. And you are on your way to the best Budget Friendly Kitchen Island Lighting you will find. Good Luck